Custom Domain page using Cloudflare Pages
Set up a basic webpage to showcase yourself, for no cost, with automatic deployments from branch management.
Cloudflare makes hosting a website, easy, secure, and completely free to host <3. While other cloud providers offer free tiers for a temporary time, Cloudflare(CF) offers a free tier with no time/credit limit.
As such, we will be reviewing how to not only host a serverless website through CF but also redirect our project to our own custom domain. I included the guides that helped me through each step of the process. If you get stuck at any point I recommend going over the corresponding Reference Guide
Prerequisites
- Git/Github
- A supported Frontend Framework (html, React, Jekyll, etc)
Time Requirements
- Create Cloudflare Account - 10mins
- Enable/Buy Custom Domain - 15mins
- Setting up CF Pages - 20mins
-
Connecting CF Pages - 15mins
- Total Time w/ tutorial reading - ~2hours
Creating a Cloudflare Account
Reference Guide
Create a Cloudflare account, and make sure when asked for what account tier you want to sign up for, scroll down and select the Free Tier.
Follow the instructions provided and then verify your email to activate your account.
Enabling your Domain
Reference Guide
To operate, CF needs to be the entity in charge of resolving DNS requests. If you do not already have a domain, like example.com, you can buy one through Cloudflare, and skip this section as it will automatically be set up.
Otherwise, if your domain is owned elsewhere, prepare to transfer DNS responsiblity to CF.
I purchased a domain on NameCheap, and had to do this process. Simply following CF’s setup process for a domain, their documentation is excellent. For myself, CF was able to automatically import most of my existing records particularlly for my custom domain email.
- Note
- I did have to redo the process for DKIM settings. Refer to my domain email post here
At a certain point in this process CF will provide you with CF nameservers to change on your domain owners site.. You will need to login to your domain provider, such as NameCheap, and change who controls the nameserver.
After this, you should be finished. It can take up to 48hours to change, but should be much less than that. Enough time for us to complete the rest of the steps.
NOTE: This will leave your default domain provider in ownership of the domain. However if you desire, you can change ownership to Cloudflare. Instructions
Setting up CF Pages with Git integration
Reference Guide
We will be using the Cloudflare Pages product. This product supports automatic deployment of sites through simple Git Repo branch tracking. As such we wil need a repo to track our frontend project, either in Github or Gitlab. You will need to have a existing project to host.
To begin, go to the CF Dashboard, and then to the Workers & Pages setion and then Create. This sections defaults to Workers, but we are using Pages, so change the tab along the top of the page.
Now on the Pages section, we want to select the Connect to Git. This will allow you to authenticate with your Git repo provider, and select the Repo you want to share with CF.
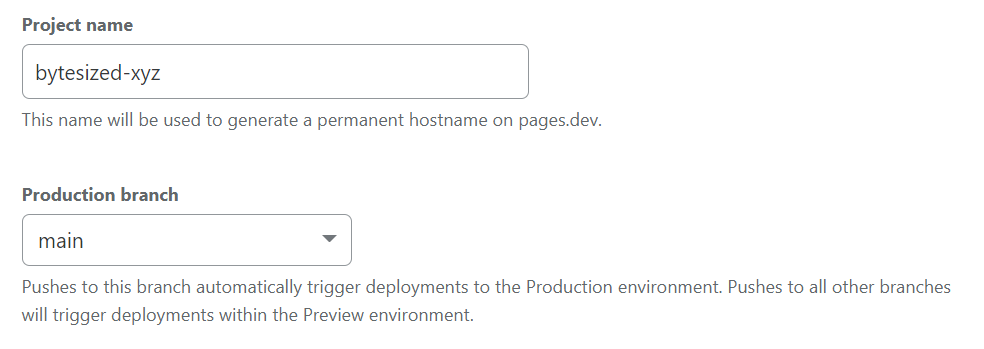
Then you will want to configure your deployment, so CF knows when to automatically update your code. I recomend using your main branch to use as production and then create another dev for pushing working changes into.
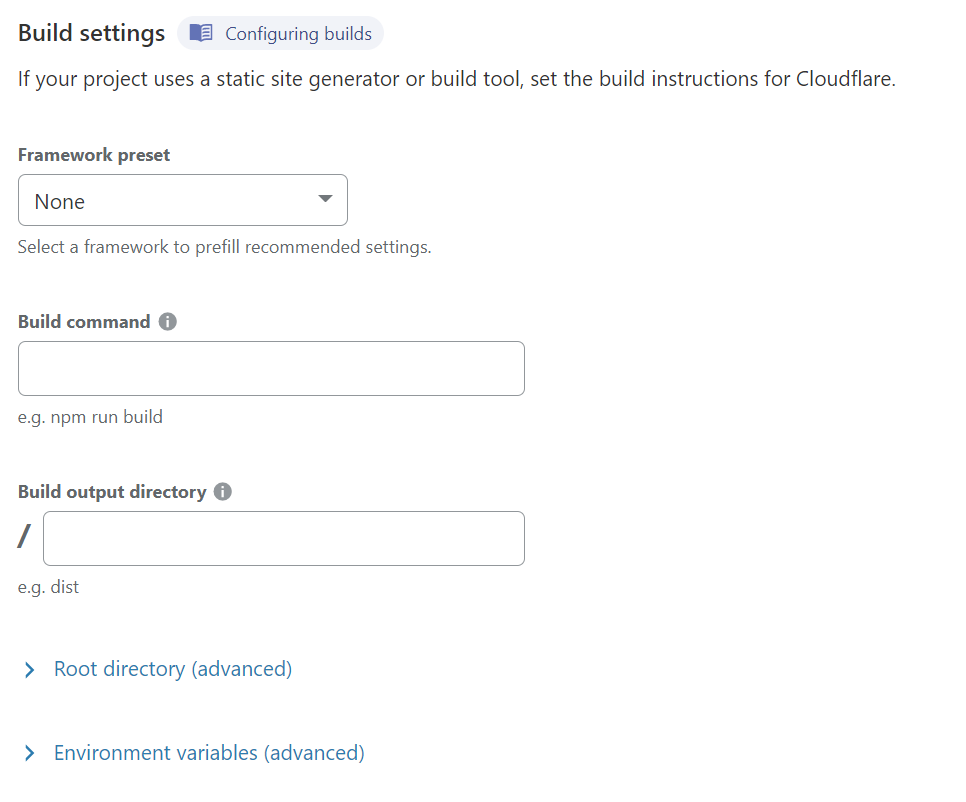
Now with your project successfully connected to CF, they will ask you to decide what the build command for the project is. They have many default ones available, and a helpful guide for most projects here.
EXAMPLE:
- For my base website, using Static HTML, there are no build instructions. Leaving it blank
- For this technical website, I use Jekyll and use build command
jekyll build
You can also assign Environmental Variables here if your project relies on one.
When you have finished configuring your project for CF Pages, click Save and Deploy. Your project will start to build and you will be able to see the output of the build. It will also give you a subdomain linking to your page.
IE. 123456.project-name.pages.dev
Connecting Pages to our Custom Domain
Reference Guide
Now we have accomplished importing our domain, and creating a CF Pages project configured to deploy any changes pushed to the main branch. We now have a Pages subdomain serving our site. To progress, we now want to connect this subdomain to our domain.
Return to Workers and Pages and select your Pages Project, then select Custom domains along the top section.
Next, select Set up custom Domain. First choose the desired Domain you want to link this Pages project to. Second, allow CF to setup the correct records to forward your Pages subdomain to your personal Domain. This should be an automated process.
And we are finished!
Recap
With all this done, it may take a few hours for all the changes to take effect and have your website running. For no cost, we have setup a serverless application, able to scale, and able to automatically update based on branch rules in our Git Repo 🎉🎉
Enjoy hosting your project with no infrastructure to manage


